microstrategy-images-on-hypercards
Joaquin Attanasio

Joaquin Attanasio

Business Intelligence Consultant | Microstrategy Expert | Data Specialist

Other Articles:

Images on Hypercards

Share on linkedin
LinkedIn
Share on facebook
Facebook
Share on twitter
Twitter
Share on whatsapp
WhatsApp

Hello everyone again! How are you doing? How are these Microstrategic adventures going? Join me for one more week in our #BestInMicro corner, to comment, share and review tips, secrets, and tricks to make the best boards!

This week we are going with a little help that always comes in handy. Today we are going to learn how to add images to Hypercards.

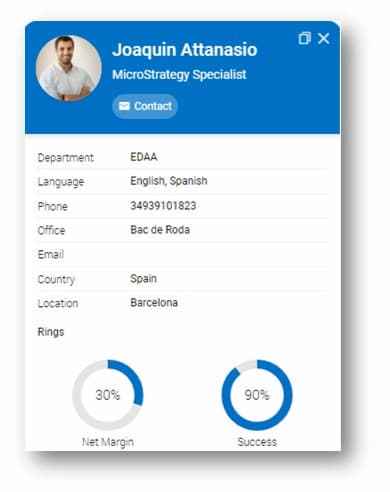
Imagen Hypercard

Introduction

As of the latest version at the time of this writing (2021), there is still no major news regarding the possible use of images in Hyper. It is true that in some presentations or images that can be seen there are several “demos” where there are images embedded or embedded in the cards, and logically this capability is very limited to the version in which it is used.

Even the SDK can be a very important factor when customizing a card, but now let’s limit ourselves to what is available.

Hypercard structure

First, it is important to understand how the cards are structured. These have a key fields and values.

Estructura Hypercards

The key field is what defines what the card will search for (the name, id, etc), so it should go in the header. But here comes the magic: Only 1 attribute can be used per header.

Why am I telling you this, you may ask. Or maybe you’re not, but I’ll tell you anyway. The images can go either in the header or in the body of the card.

Body

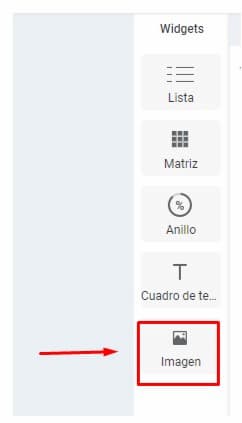
To add an image in the card body, starting from version 2021 the image widget is added.

Hypercard body

Simply by dragging the widget you can add images from the repository or from a URL… whatever you have available.

Header

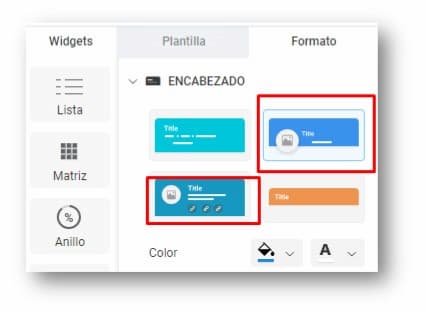
Here it is a little more complex than the previous one. As I told you, we cannot drag and drop an attribute other than the key to add an image to the header, as this only allows one attribute. And it is important to select templates that contain an image in their header structure, as shown below:

Header image

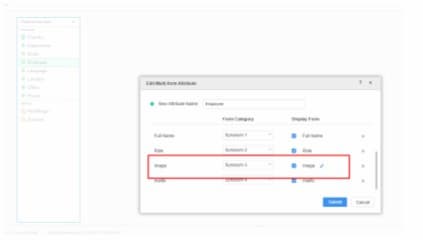
That is why the first step will be to create a composite attribute, where in addition to having the key fields, it will have, as a separate form attribute, the image in HTML format.

Imagen HTML

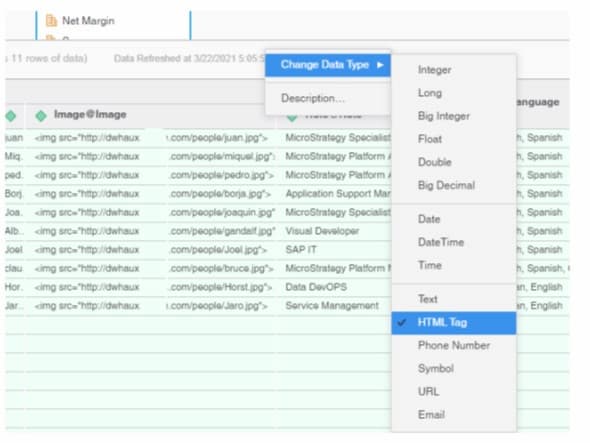
This means that you will have to specify the data type of the column when importing it.

HTML Tag

Finally, in my example, I have all the images in a repository and jpg format. But if I call them by name, logically it will not detect them. That is why we will have to use the Data Wrangler and add the html tag, so that it will be detected:

Ejemplo imagen 1
Ejemplo imagen 2

Once this is done, we can create a dossier and simply add the attribute. If the image is visible… voila! We have everything ready to add to the card!

Anyway, simple article today, but quite useful. As you will see that adding an image is sometimes not so straightforward… I hope you like it, and I look forward to seeing you next week!

Deja un comentario

Your email address will not be published. Required fields are marked *

Business Data Master Logo

No te pierdas el

WEBINAR
Gratuito

Explicaremos en detalle los contenidos y objetivos del Business Data Master

29/11/2021

18:30 (GTM+1)

Online

BUSINESS DATA MASTER

* Tu información será utilizada exclusivamente para contactarte en relación al Business Data Master. No hacemos spam ni compartimos datos con terceros.